Friday, October 12, 2012

BROKEN_MENDED HEART


The letter fold in the last posting was shown with a heart poked in the front pocket.

Here are some samples of the version I have been using.


I have long been a fan of Edwin Young's Broken-Mended Heart.  http://faculty.purchase.edu/jeanine.meyer/origami/oriheart.htm

The problem with Young's original version is that it cannot be viewed from two sides. Sinking the folds means that the two sides come apart rather too easily.  I have modified Young's model so that these problems are resolved.   


Here is a Crease Pattern incorporating these changes.


Here are some hints on how to fold the relevant modifications. 


The tabs shown in Step 6 are pushed into the corresponding pockets on the opposite side when the model is collapsed. This stops the model from coming apart easily.

The tabs shown in the last steps are tucked into pockets on the top of the heart.   This method shapes the heart so that it appears more natural at both stages of the breaking and mending process.  Young's version looks oddly flattened on one of the two positions.

These diagrams are taken from my full length Instruction PDF which will shortly be on sale at my new ETSI Shop.   I will post a link to that site when it is up and running.  

ETSI does not provide an electronic down load function. Purchased items have to be physically emailed at some point after the seller gets the information from ETSI.  That can take hours to days.   Other options require a Web Page but, as I have already mentioned, our server is crashing and needs replacing with a more reliable model.   We intend to get around the problem by writing (and testing) a script that will email the purchased items instantly.  

It should take about a week to iron out all the problems.  From that point expect to see a LOT of diagrams suddenly become available for items that have been featured on this Blog, and a whole lot of other creations that has not been mentioned.


Thursday, October 11, 2012

DIAMOND HEART LETTERFOLD


.


This letter fold has two parts.  Part One is the letter fold itself.  Part Two is my variation of Edwin Young's Broken-Mended Heart. 

Here is Part One.

This model is quite easy in both its concept and the folding required.

We start by folding the paper in half lengthwise.  We make diagonals starting from the center (you will need to make a marker crease here).  Then we roll the model up from both sides.  The remaining flaps are tucked into each side.  The top flap has a little bit of extra fiddling so that it looks right and so that we get a tab to pull to start the letter unfolding.  It's pretty secure until you do that.

You can slot anything you like in the front pocket.  I choose the Young heart (with a few modifications to make it two sides and secure) because its construction allows it to be slotted over the edge of the pocket for effect.  This will stay put provided you don't turn it upside down or knock it.  Put the heart in the pocket for safe keeping while transporting the letter. 

I have completed diagrams for this model and for my modified Young heart.  I have also completed diagrammed instructions for the Double Wrap model.  I will make them available just as soon as our crashing web page host machine is upgraded.  That might be a month or two.  I'll keep you posted. 

Monday, October 8, 2012

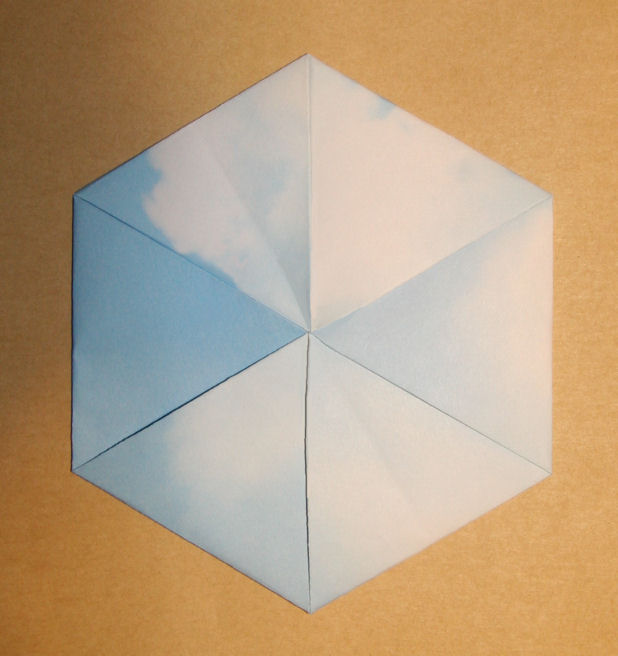
HEXAGON LETTER FOLD


This Letter Fold is based on a hexagonal coaster design that is in the public domain.  There are, however, a few modifications that are required in order to make it work as an interesting letter fold for American Letter and A4 sheets.  (Yes, this model works for international sized paper, too.)


The standard methods that origami enthusiasts use to make a hexagon from a rectangular sheet assume that the folder will cut off the excess paper and just fold up the hexagon.  A letter sheet or some other rectangle is commonly used and the folding it begun from one end of the sheet.  These Letter Fold versions start in the center of the paper.  The means that the excess paper is evenly distributed at the top and the bottom of the rectangular sheet after the basic hexagon shape is derived.  We do not cut it off. 


BASIC FULL COLORED VERSION


The basic full color version displays the colored side of the letter head paper and tucks the extra-hexagon parts inside the model.  For this reason, it works best with the thinner versions of letter head paper.


The front shows the tucked in sections.  The back simply shows crease marks.  You can add extra crease marks to make the model completely symmetrical instead of having just one crease joining mid points on opposite sides.

Here is the Crease Pattern for the Basic (Full Colored) Version.


The orange sample shows the front (on the left) and the back (on the right) of a model using the basic method with the addition of extra creases (mid side to opposite mid side) between all sides.  If you make these pronounced it will allow the model to be used as a spinner.  The message inside could be something like "You make my world go around". 


Here is the crease patterns for the Full Colored Spinner Version. The additional creases are marked in orange (mountain) and lime green (valley).  Smart people (= you) can probably figure out how to add them without referring to the Crease Pattern. 

COLOR BLOCK VERSIONS

If the model is folded up from the colored side, instead of from the white side, we get a model that displays the colored edges.  This "waste" paper becomes a decorative feature instead of being hidden inside the model.  This is the recommended model if you want to write on the letter head side of the paper rather than the white (or other colored) side.  


 The first example (mauve and white) uses American Letter sized Letterhead paper (8.5 inches x 11 inches), the second (orange and purple) uses duo-color sided construction paper (9 inches x 12 inches) and the last example (yellow and white) uses construction paper that has been cropped to an A4 ratio (8.5 inches x 12 inches).  The "white" tips get progressively smaller as the length of the paper increases in relation to its width.

 Here is the Crease Pattern.  It's the same as the All Color version in reverse.  If your paper is strongly patterned on the Letter Head side (which is not very usual for such paper) then you will find it easier to do all your preliminary folding on the white side;  the crease lines are easier to see. It is relatively easy to reverse the crease direction prior to folding up the model into the coaster shape with the colored side of the paper up. 


Of course, there is a Spinner Version of this variety also.  We just add some well creased additional creases connecting the mid points of opposite sides.  That's not nearly as difficult as the Crease Pattern makes it look.  We mountain fold between the hexagon's section boundaries and valley fold between the mid points of the opposing sides.  Look at the pictures for clarification.


FULLY DIAGRAMMED INSTRUCTIONS.

I have provided the basic crease patterns here but I am in the process of putting the finishing touches to fully diagrammed instructions.  They will be available for purchase when they are completed. The cost will be quite small (so you can all afford it) but it will help provide the essentials that I need to  complete diagrams of other models show-cased on this Blog. As you are probably aware, good diagramming takes quite a bit of time to do properly.

Here is a sample of what you will get.


Sunday, October 7, 2012

DOUBLE WRAP LETTERFOLD: A4 Version


I made time to try out the Double Wrap Letter Fold with a sheet of A4.  As I suspected, using this sized paper requires a little modification to make the model work.  After crumpling several sheets I found a set of creases that works.


 Here is the result.  I didn't have any letterhead paper so I used some colored pencils to make it clear where the colored (letterhead) side or the paper shows on the outside of the folded model.


It looks a little different, both front and back, but the general idea is the same.

The down side is that there is less room on the inside to write your letter.  When the paper is in the normal longitudinal orientation, the top and bottom margins are rather wide.


Here is the Crease Pattern.


The last  (optional) crease is no longer required.

The method for finding the long side walls has changed.  To make the model work you need a crease at the 7/32nd mark.  On the right side of the pattern I have shown how this is done.  Follow the numbers.  To get the number 5 crease just match a long side to the "4" line on the other side of the mid-line. 

 Enjoy.

Saturday, October 6, 2012

DOUBLE WRAP LETTERFOLD


 This post continues the Letter Fold Series. 

Once again, the pattern is designed for American Letter sized paper.  This one may have to be modified slightly for A4 paper.  (I have been too busy designing other models to try this out yet.  Some of you people that use "normal" (international) sized paper will probably beat me to it.  Please share.

The Double Wrap Letterfold is unusual in that the paper tucks in on both the front and the back sides.  First we collapse the front, then we bend the flaps around to the back and, after a few minor adjustments, tuck them under each other in a clockwise direction.  But I'm getting ahead of the folding procedure here.


There is a fair bit of pre-creasing but I won't apologize because this makes the collapse process relatively painless.

Just so that we are clear, the red unbroken lines are mountain folds and the blue and green broken lines are valley folds.  The pattern should be readable after printing it on a black and white printer.  Using the standard  -..-..-..-..-  mountain crease symbol makes it difficult or impossible to unambiguously decipher patterns with small crease lines.  Marker creases and those which are not used in the collapse, but are necessary for obtaining essential creases are marked with dotted lines in a pale color - grey if it does not matter whether they are mountain or valley folds and pale blue-green or red-orange if it does matter. 

Now we've got the preliminaries out of the way, let's get on with the interesting parts.

Begin by folding the longitudinal marker creases:  half, quarter, eighth and finally, two lines on the sixteenth grid.  Crease these hard because the rest of the model rests upon them.

Turn paper 90 degrees.  Using the 16th creases fold the left side of the paper towards the center and then fold the right side of the paper over it.  Turn the model over (colored side up). 

Using just the two top layers crease a diagonal as shown.  Bend the paper over to make a side wall (and a square).  Repeat on the other end.  Don't forget to refold the paper or you will get the reflected diagonal on the wrong side.  Not good.

Open up the paper and put it colored side down.  Re-crease (valley fold) the side walls, making sure that the crease starts at the top of the new diagonals and the center marker fold lines up.  This should ensure that you have a square square rather than a sloppy faux one.  :-) Do both ends, of course.

With the short sides on the top and the bottom, fold the left and right sides towards the center, as you did when you made the square, but this time it doesn't matter if you start with the left of the right flap because you are going to fold through all layers. 

Do not turn the model over (which is what you did last time, right?).  Valley crease a diagonal (through all layers) across the central rectangle from the top left to the bottom right.  Don't fold the other the diagonal.  

Open up.  (Colored side is still down.)  The central diagonal should be reflected on the sides.

Now refold the diagonal so that it extends from top to bottom.  It will not quite intersect the corners.  (See the crease pattern.) 

O.K. guys, we are nearly to the easy part, because you have all the major creases by now.

You could try collapsing the model, clockwise, using the thick lines around the sides and the central rectangle as the base.  However, I recommend creating those green creases first. 

To do this, start with the paper, white side up, and short sides at the top and bottom.  Got that?  Bring the left side towards the center, using the thick red diagonal on that side and the thick blue crease that nearly bisects the corner.  The top will start to come down towards the center.    Make sure that the right hand side of the top flap lines up with the right hand side of the rest of the paper.  Squash the left side out gently.  That should make the green crease. 

Repeat the process on the other side.  This time do not unfold it.  You have started the collapse process. 

Continue folding down the sides around the base in a clockwise direction.  If you creased everything firmly it should be very easy as those thickly marked side creases almost want to fold themselves.  Ease out the final diagonal so that you have a four white wings as the picture shows. Only two sides meet in the middle; the other two are offset. The ones that meet along the central diagonal do not reach the sides so that the offset flaps have "tails".

Ta da!  You have the front completed. 

Bend over the flaps to the back of the model.  Turn it over.  Now we finish the back.

The two flaps with the white tails are complete.  The other two flaps need to be narrowed so that they meet along the diagonal.  You will find the lines already there on one side.  Re-fold them so that the other side is also creased.  Fold any excess paper over the edge, unfold and tuck it between the layers of the point.  (You can skip this step but it makes it easier to slot these flaps under the other ones during the final step.  It also makes the back look neater by removing any little bits that ruin the nice straight lines of the folded flaps. )

The last bit is easy.  Beginning with one of the white tail flaps, fold the flaps towards the center in  clockwise direction, one over the other.  Tuck the final flap (a pointed one) under its neighbor.  And there it is - completed.  If you have make one you are happy with then photograph it and send a copy to this Blog.  Be famous! 

Now unfold the model, write something nice between the crease marks on the white side , fold it back up again and send it to someone you like. 


= = = = = = = = = = = = = = = = = = = = = = = =


I will eventually make diagrammed instructions.  These are time consuming and I am considering selling them, for a reasonably small amount,  to those who can't follow crease patterns and my picture-free verbal instructions.


Friday, October 5, 2012

LETTERFOLD: CENTRAL SQUARE CROSS


LETTERFOLD:  CENTRAL SQUARE CROSS


Here is the next in the Letterfold Series.

This one also uses American Letter sized paper.  That is:  8.5 ins x 11 ins  or a ratio of 17 to 22.   Once again, this pattern will probably work for A4, but I have not tried this yet.  Could my non-American followers try it out and provide us with some photos of the finished product, please.  Come on, you know who you are.  Now get folding.


Thursday, October 4, 2012

LETTERFOLD: BOWTIE


PREAMBLE

This is the first post on this Blog for a while. 

We are recovering from the effects of a serious IRS mistake. They thought we had earned 3 million dollars in 2000, and took away most of my husband's wages for several years.  This  resulted in us using up all our savings in order to survive, being evicted from our previous house while I was still recovering from major back surgery (which did a lot of harm), learning how to be lawyers so that we could represent ourselves in a dispute with our ex-landlord (we won), missing two Christmases for lack of cash, dealing with the problems of having to drive unlicensed vehicles to stay alive and managing to avoid bankruptcy due only to the extreme generosity of a couple of people.  And of course we had no money to pay a lawyer to fight with the IRS.  We eventually told them that our son was on food vouchers and if they milked any more money from us we would die, suicide or become homeless and unemployed - any of which would result in us paying no more money to them.  They have backed off.  They have all our paperwork (the third copy of these - they lost the first two) but have not yet processed it.  That was almost a year ago.  Sigh.

I developed a thyroid deficiency problem as a result of the extreme stress and am gradually getting that under control. 

On the plus side, our seventeen year old managed to graduate from High School in spite of all the drama and uncertainty.  This is particularly amazing because he suffers from Asperger's Syndrome which makes any change stressful, let alone what he has been through for the past few years. 

We are rather battered, but we have survived.  I am now able to concentrate on origami design once more. 

This is the first of several letterfolds that I designed over the past few days.  I will deal them out as I complete photogenic models and crease patterns.  I aim to complete some diagrammed instructions (time consuming) and teach at least one of the models at the upcoming Berkely Convention.  If you are a San Francisco Bay resident then perhaps I will see you there.


BOWTIE LETTERFOLD (AMERICAN LETTER SIZE)

Although this was designed for  American Letter sized paper it will probably work for A4 as well.  If one of you tries this out please photograph the results and share them, and your comments, with us.  I'll post them on this Blog.

Here is the Crease Pattern. 

A word of warning.  In order to fold this without tears you will need to refold the two vertical  valley creases on the short side so that they are temporarily mountain creases. 

Push the points of the orange triangles on the long sides to the center to collapse the model. 

Then refold those mountain creases back to valley creases.

Push these center flaps so that they are facing along the center in the other direction (90 degree turn). Flatten.

Turn the points under.

Tuck the four flaps in the pockets below (not into) the ears of the white bow tie.

If this is about as clear as brewed coffee then you will just have to wait until I complete the diagramming - or come to the Berkley convention and I'll show you. 

Remember:  all broken green lines are valley folds and all unbroken orange lines are mountain folds.  (Except for the alternating vertical folds on the sides.)